Drawing a portrait with dip pen
This is a drawing of my sister-in-law Nanna, where I have used a dip pen with a school nib (very fine line, non-flexible) and Sumi-ink. The pen and ink is from the japanese company Zig Kuretake.
I used a reference photo which was shot by my other sister in law, Hedvig. It caught my eye becuase I liked the light and Nannas pose drinking the glass of wine. The drawing is created on A3 sketchpaper from Bünger since it was what I had handy at the time. The paper is not ideal for inkwork, but since the lines in this drawing is very thin the ink did not bleed through the paper.
1. The beginning
My first step was to do the pencil sketch. I draw until I get it right. I don’t bother with keeping it clean, because I can then transfer my sketch to a clean paper. When inking the drawing I don’t want to much clutter underneath the ink, so by transfering it I get a clean start.
There is also another positive with this method, which I got use of here. I actually messed up with the first ink-drawing, putting my inky hand on the paper (DON’T DO THAT!). Since I had the pencil-sketch I could transfer it to a new paper and start over.
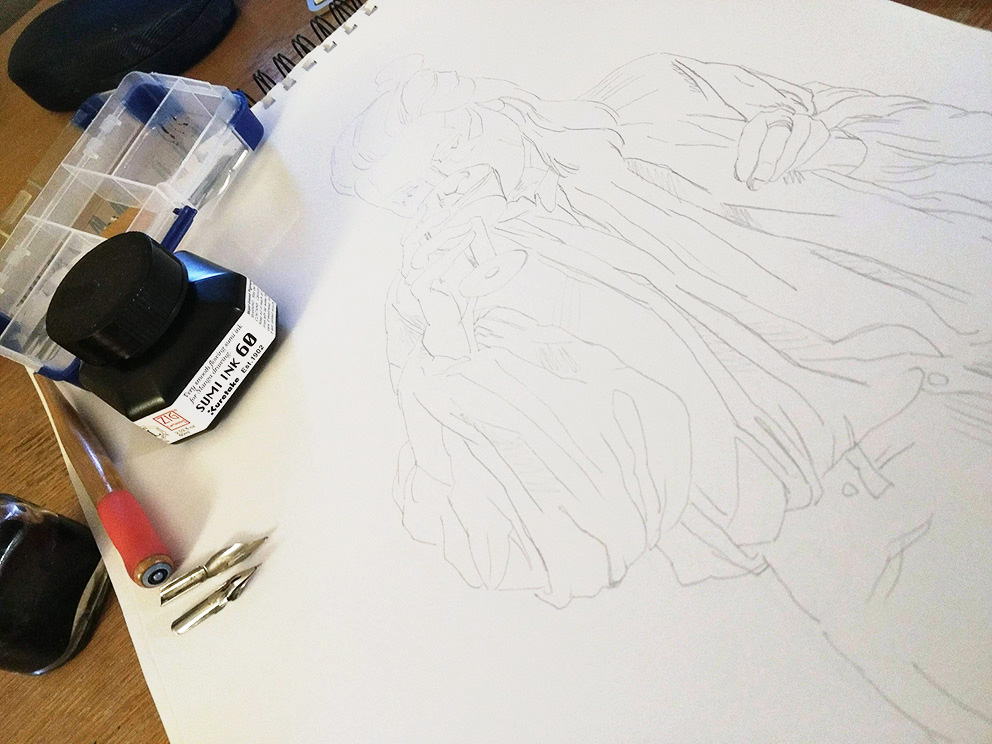
2. Start with the ink
I started with the hatching. Here I have begun with the areas I felt would probably be the darkest, and in some way the easiest. The darker parts are easier, because you dont have to be so careful. If you mess a line up you just going to cover it anyway.
Process image photographed with phone:
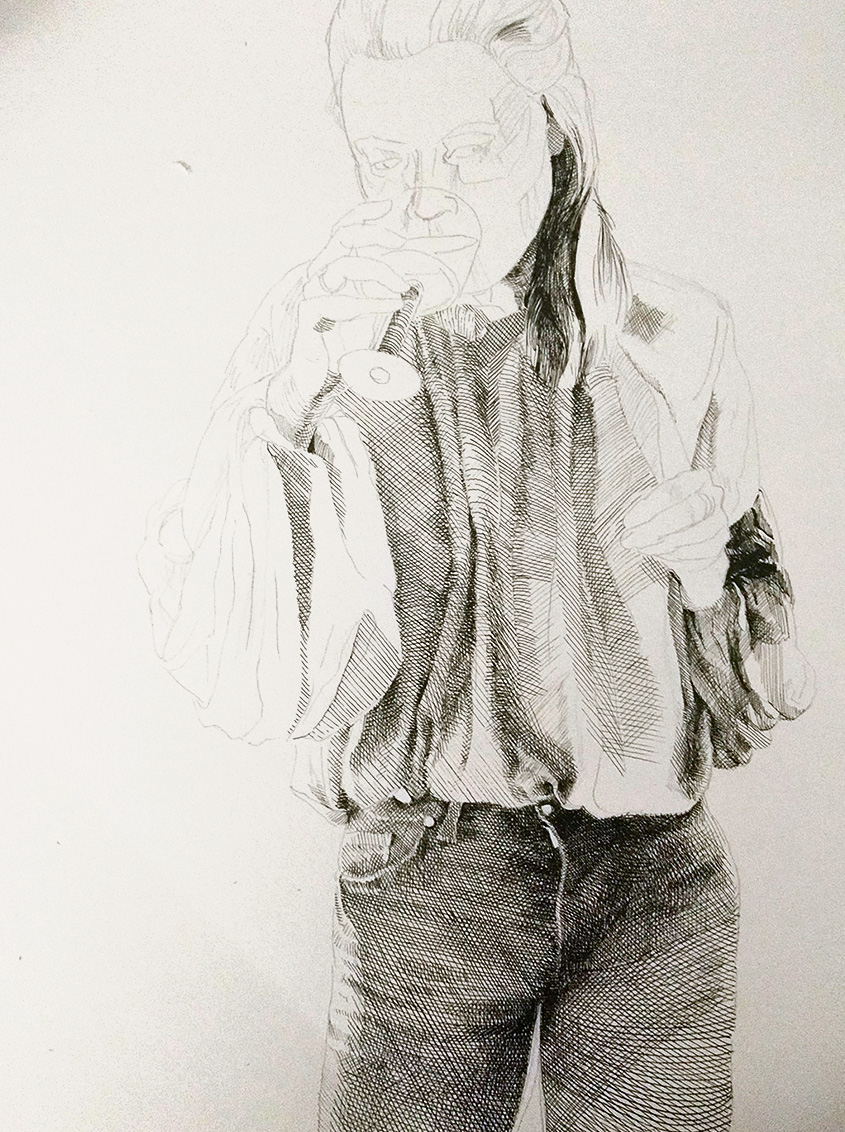
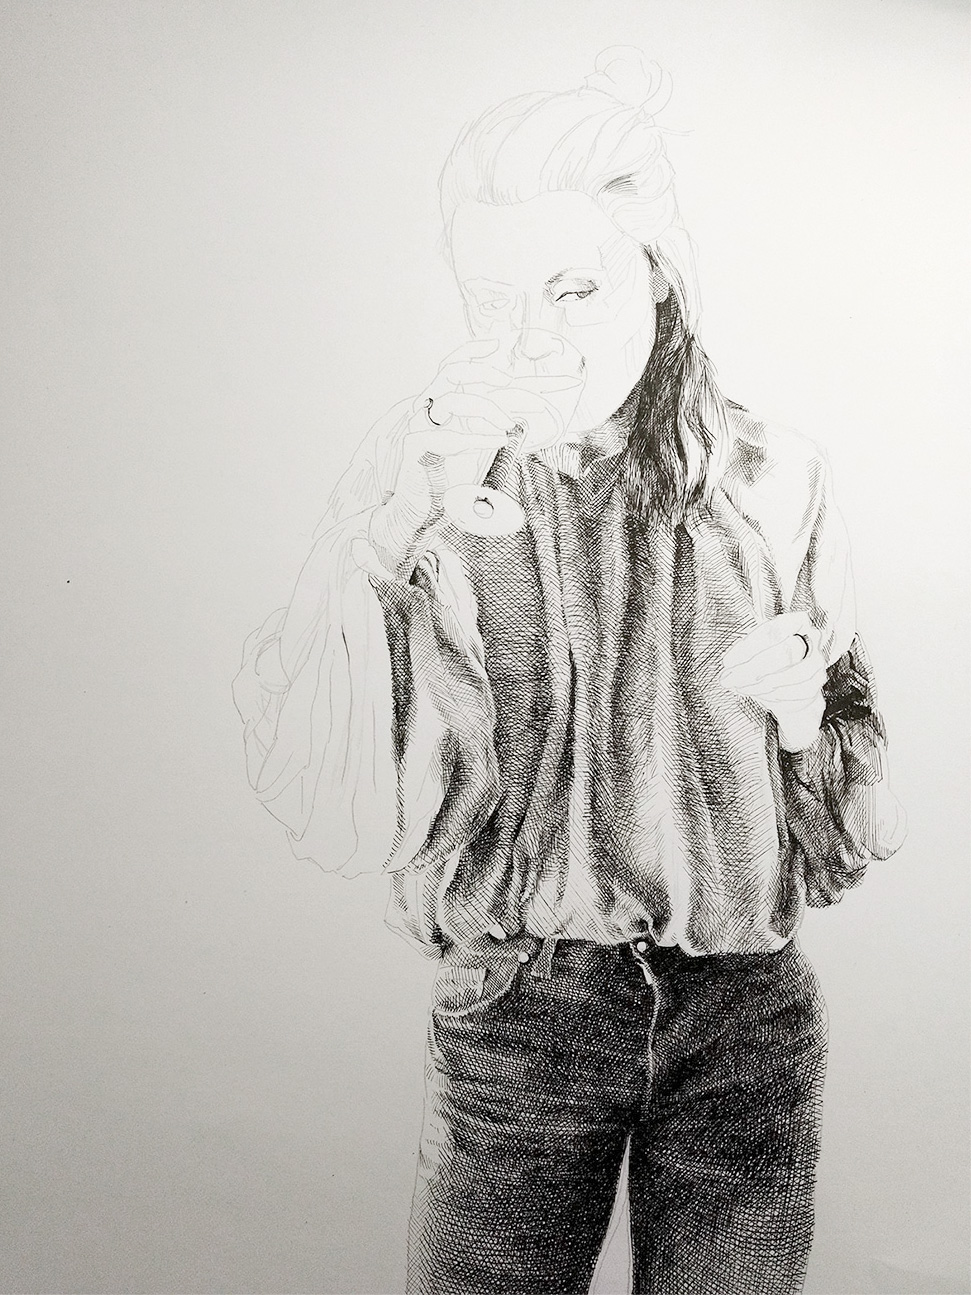
3. Inking the drawing
Keep on hatching lines. Dip the pen, dip the pen, dip the pen. During the process I try to make sure that there will be a balance of light and dark in the end. The best way to do this is to work all over the place, doing passes over the whole surface. As you might notice I don’t really do that. So… do as I say, not as I do ;) I use a combination of lines that follow the form, and straight lines just showing the light. I think that this gives the best combination of form and atmosphere.
Process image photographed with phone:
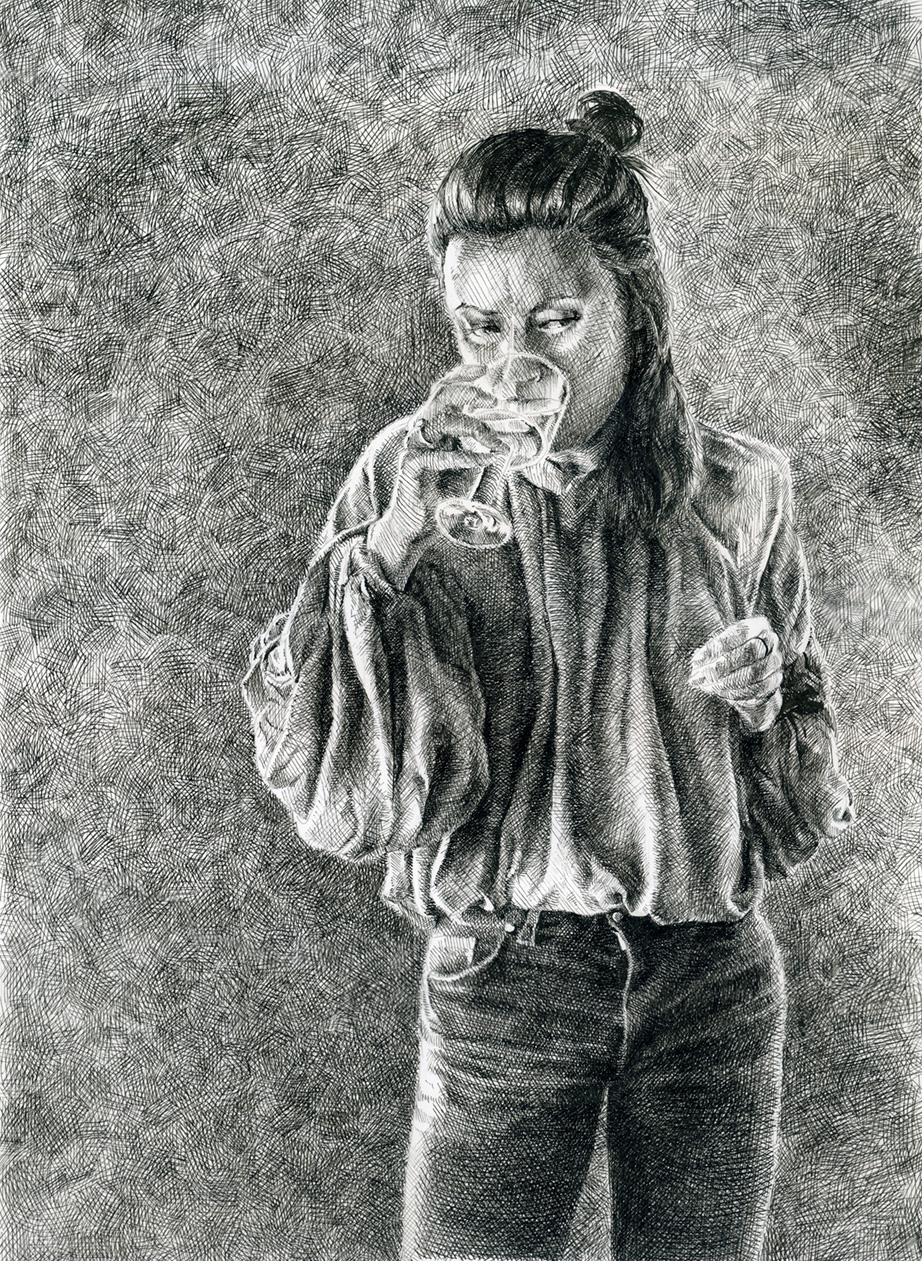
4. Finishing up
With a lot of work and patience here it is, the end result. Sometimes I don’t stop in time and the image will go dark beyond repair, since I can only go from light to dark – not the other way. But this time I feel I stopped in the right moment. Eventough I see other problem that bugs me, but artists dont tell ;)
Final image, quality scan:
And that’s all there is to it.
2 replies on “Drawing a portrait with dip pen”
Just incredible. Amazing. I’ve just come across your work and to be honest I swore. You should be able to give up the coding and this be your career. How you can be so into coding when you can draw like this is beyond me. :-) How long did this drawing take? Well done Mattias, just brilliant.
Hello Mark and thanks for your comment :) Well, I’ve was working as a portraitpainter long ago, but deadlines and the need to create artwork not of your own choosing took the fun out of it for me. Programming pays the bills in a more stable way ;)
By the way, sorry for taking so long to answer your comment – I missed it, because is was the first comment since I published this my new site.